As stated in the introduction, the CNC (Computer Numeric Control) controller is the main interface between the program and the user. Everything the user sees and interacts with on the computer is through the Radonix program. To ensure the proper interface, the user can access the folder of different router interfaces through the barcode and download the desired one.

After downloading the interface, double-click on the downloaded file and follow the steps below.
⚠️ Note that due to the variety of interfaces, they are represented as x-x-x in this text. The user should use the appropriate interface based on the type of their device. For example, one of the router interfaces is shown in Figure 23 (for more information, refer to Chapter 5).
 Figure (23)
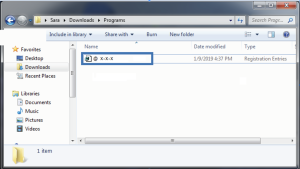
Figure (24)
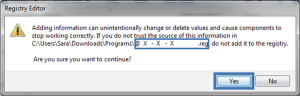
Figure (25)
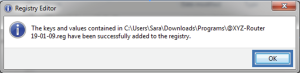
Figure (26)
The interface has been installed correctly and the software is ready to launch.
To access the installed software, go to the Start menu in Windows and search for “Radonix” in the search field. You will see three Radonix icons
(refer to Table 3 and Figure 27) as follows:
|
Radonix CAM-Pro |
The main Radonix software |
|
|
Radonix CAM-Pro Calibrator |
It is used for axis calibration. For more information, please refer to Chapter 6. |
|
|
Radonix CAM-Pro Test |
It is used to test the controller. For more information, please refer to Chapter 7. |
Table (3)
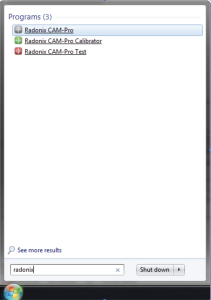
Figure (27)